I’m a graphic designer and I’ve been using Adobe Illustrator for more than 10 years. I have been in your position when I first started using Illustrator, so yeah I can totally understand that the struggle is real – not knowing which tool to use, etc.
There are different ways to combine shapes or objects in Adobe Illustrator, and if you choose the right tool, you can do that in a couple of clicks.

You’d be surprised how easy it is to combine objects. There are plenty of ways to do it but I’m going to introduce you to three common ways and actually the most useful ways to combine shapes in Illustrator.
Group Paths Into Fillable Objects/join Open Paths In Illustrator?
To begin with, I’d love to show you a simple example of how to combine two shapes using Shape Builder, Pathfinder, and Group tools.
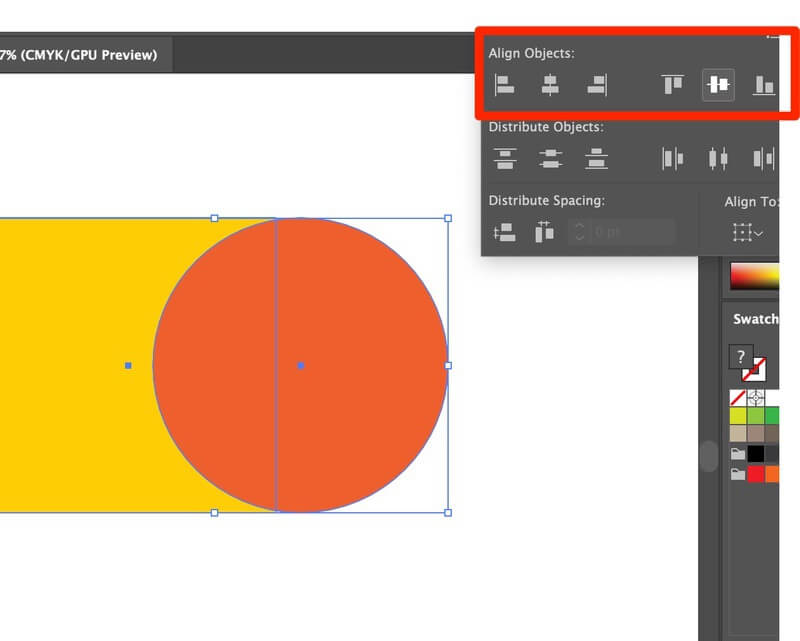
First of all, I have created a rectangular shape using the Rectangle Tool (Keyboard shortcut M) and a circle using the Ellipse Tool (Keyboard shortcut L). Now, you will see what you can do to combine them using three different tools.
It’s quick and easy! Basically, you just click and drag to connect the shapes you create. And actually, many designers use this tool to create logos and icons.
How To Create A Photoshop And Illustrator Smart Object
Step 2: View in Outline mode. View > Outline. It helps you avoid missing points and make sure the graphic surface is smooth.
It’s going to look like this: (don’t freak out, the colors will come back. When you want to go back to your normal mode, just hit Command + Y again)
You won’t see the Pathfinder tools on the toolbar, instead, they are shown in the Properties panel when objects are selected. In case you didn’t know what it looks like.
Create A Radial Pattern In Illustrator
If you don’t see this panel, you can open it from the overhead menu Window > Pathfinder. Under the Pathfinder panel, you can find ten different options to modify your objects. Let me show you a couple of examples.
Step 2: Click the Divide tool icon, (When you hover your mouse over the small icons, it’ll show which tool you are using.)
It keeps your artwork organized! I literally use the Group tool (Shortcut: Command + G on Mac, and Ctrl + G on Windows.) in all my artwork. It’s one of the first tools I learned in my graphic design class. For creating a simple shape, the Group tool can be so convenient. You’ll see!
How To Merge And Group Layers In Illustrator
If you wish to ungroup, right-click on the mouse and select Ungroup or use the keyboard shortcut: Command + Shift + G.
There you go! As simple as that.Now, this is how you combine two shapes. If you want to combine text and a shape, that’s a different story.
The easiest way to combine shape and text is by grouping them together. In this case, you can move, resize, and rotate the text and shape together. But that’s pretty much it, nothing fancy.
How To Use The Intertwine Feature In Adobe Illustrator
Step 2: Create a shape that you want the text to merge into. For example, I created a circle. Make sure the shape is on top of the text. If you’re doing them on the same layer, you can right-click on the shape and choose Arrange > Bring to Front just to make sure.

Step 3: Select both the text and shape, go to the overhead menu Object > Envelope Distort > Make with Top Object.
You probably think the example above is very basic. Well, actually, when it comes to “real-life work”, as complicated as it may seem, the methods are the same but adding a few more steps depends on what you are creating.
Ways To Create Shapes In Adobe Illustrator (tutorials)
You often have to combine the use of different tools to finish the final artwork. But step by step, you will get the hang of it. Now you’ve learned how to combine shapes.
Combing shapes in Illustrator can be quite confusing at the beginning. Now you’ve learned how to crop, group, divide and combine shapes, soon you’ll be able to create beautiful graphics and designs.
Graduated from Creative Advertising major, worked more than eight years as a graphic designer focusing in branding and Illustration. Yes, Adobe Illustrator is my best friend and I’m passionate about art and design.
Changing The Opacity Of Objects In Illustrator
My name is June, I’m a graphic designer and a problem solver. I’m here to help you solve your Illustrator problems. Read more about me and why I created this website here.Discover how easy it is to build your artwork in Adobe Illustrator with simple vector shapes that you can reshape, combine, and color to make eye-catching illustrations.
You can create a variety of primitive shapes with the vector Shape tools in Illustrator. Press and hold the Rectangle tool to view all the Shape tools, and then select the Rectangle tool. Drag on the artboard to draw a rectangle. As you drag, look for a diagonal magenta guide that shows a perfect square.
Press and hold the Rectangle tool in the Toolbar and select the Polygon tool. Click the artboard, and in the dialog box that opens, type the number of sides for your shape — for example, type 6 to create a hexagon.
How To Divide Objects In Illustrator
Draw some overlapping shapes. Switch to the Selection tool and drag a selection marquee around all the shapes to select them. Select the Shape Builder tool and drag a line through all the shapes you want to unite into one shape.
It’s just as easy to break apart and erase parts of overlapping shapes. Select all the shapes. With the Shape Builder tool, click any part you want to punch out as with a cookie cutter. Don’t worry if it still looks the same; you’ve divided them into separate pieces.
To color an object, you assign it a fill color, a stroke color, or both. Similar to working in a coloring book, a fill adds color to the area inside a path or shape, while a stroke outlines it.
How To Make 3d Objects In Illustrator
Use the Fill and Stroke color boxes in the Toolbar — you edit them one at a time and the highlight shows which box is active. Select an object and double-click the Fill or Stroke color box.
Select Hue (H). Move the rainbow slider (1) up or down to pick a color range, and then move the round marker on the left (2) to adjust the brightness and intensity. When you’re happy with the way it looks, click OK.
You can always remove an object’s fill or stroke — just click the None button shown with a red line. Press X or click the double-headed arrow to swap the fill and stroke colors instantly.

How To Quickly Build Shapes In Illustrator
Try to apply the skills you’ve learned to draw all kinds of objects and add character to your illustration. See Take text to the next level to learn how to make striking illustrations with text.If you’ve used Adobe Illustrator before, you’re no stranger to the five available shapes you can use to create artwork. And you’re also probably familiar with the situation where you start stacking different shapes on top of each other to create a custom shape.
Sometimes that works out just fine. But other times, for instance, when you’re trying to add an outline to your object, having multiple shapes stacked on top of one another causes problems.
Guess what? There’s actually a way to combine your shapes into one object, giving you a much cleaner and simplified solution. The secret: the Pathfinder Panel. Not only can you combine shapes, but you have 10 different options for combining them.
How To Convert And Organize Smart Objects In Illustrator
To show you how each of the 10 modes work, I’ve made these nice little abstract objects that consist of two squares and two diamonds (all with white outlines) stacked on top of each other. We’ll go through each of the Pathfinder Panel’s modes (left to right, top to bottom) so you can see the difference each mode makes.
On the left, I used the Unite option. Just as it sounds, the will unite your shapes into one single object, using the outermost edges. Notice how it selects just one color — it automatically selects the color from the frontmost shape. But now that it’s just one object, you can easily change that.
The shape on the right was created with the Minus Front mode. Basically any space where two or more shapes overlap will be deleted, leaving only parts of the back shape. This maintains the same color as the last shape in your original stack.
Understanding The Adobe Illustrator Menus
The Intersect option will leave you with only the section where all shapes in your stack overlap. Again, this will automatically select the front-most color.

The Exclude option is kind of a mix between the Unite, Minus Front, and Intersect options. Like Unite, Exclude will combine your shapes using the outermost edges. But every other layer, where the shapes intersect, that portion will be deleted. It’s complex, but can create some very interesting objects.
The Divide option actually separates each little piece of the object. Notice how many more outlines there are — those are the “pieces” that can now be accessed individually. The Divide mode will automatically group everything, so it’s one single object, but if you ungroup it, then you can access those individual pieces. This gives you a

0 Comments
Posting Komentar